Sunday, 30 October 2011

The Story of The Floors

Are we sitting comfortably? Then I'll begin!

We decided we would tile the kitchen, dining room, sitting room, lobby and cloakroom floors, and the front bedroom floor as this will be used as a study/home office for us. We found some lovely Travertine floor tiles which we would use for the sitting room, kitchen etc. and shiny black granite for the home office. The total floor area of all these rooms are around 70msq so we had a pretty big area to cover.

We had originally laid the screed ourselves (you can read about that here) and although wasn't level, wasn't too bad in places, but as you need screed as level as possible to make laying floor tiles as easy as possible, we decided to put self levelling compound on the areas that were seriously out to make our life easier.

You would think, as we did, that self-levelling compound would do what it says on the bag and self-level. Well, no. It doesn't. We followed the instructions to the letter, and when it had set and we came to lay tiles, it was more out of level than it was to begin with. So two rows of the Travertine tiles back up again, and silence. Now what do we do? We had all this expanse of floor and 2.5 tonnes of floor tiles, and a floor, which at that time, wasn't suitable to lay them on.

As we assessed the damage, the levelling compound had seemed to set in mounds, so Darran was down there with the grinder over the next few days making good the floor, and after about a week we felt brave enough to start the tiling again. And it was fine, albeit a little bit of levelling needed to take place with using more or less adhesive as necessary, but we were at least on our way.

Well, it took weeks and weeks to lay the tiles. Not helped by the floor problems at the beginning which took the edge off it all. I'm not sure why we thought it wouldn't take that long. I think you just get swept up in a new phase of the build and all that enthusiasm outweighs realism sometimes! And with only working on it at weekends, it dragged on and on and on and on.

The granite tiles on the other hand, went down a dream.

Both floor areas are now grouted. The black granite is almost finished, although the final top coat of sealant has not buffed to a mirror shine (which it should) so we've washed that down as instructed and will see what happens when it has dried.

The Travertine needs the top seal coat, but will need a wash down first is it has a film of grout dust on it at the moment.

Both floors look fantastic. And they needed to after the struggle we had.

No pictures just yet, I'll wait until it's finished.

Sunday, 28 August 2011

We've Gone National!


Darran and I appear in the Mail on Sunday today as part of a piece Stephen Womack wrote on 'How to get a lot more house for your money'.

This came about via Buildstore and Jaclyn, their PR Manager. We were really pleased to be asked, interviewed by Stephen and have an 'action photoshoot' a few weekends ago. The online article doesn't show the photo of us tiling the kitchen floor, that only appears in the printed copy.

The picture above was another taken by Paul Lewis, one of the Mail's photographers who came out for the photoshoot, so we thought we'd share this with you too.

Autographed copies are available by request!

Photo Credit: (c) Paul Lewis.

Sunday, 10 July 2011

And There's Still More Colour......

The painting is finished! Only the odd touch up to go in the corners, but other than that, we have rooms with colour, real colour in a real home!

Cloakroom

Master Bedroom

Guest Bedroom

The Study

These photos come with the usual caveat 'bear with it until it's finished, you're not thinking what we're thinking'!

We had all the skirting and architrave delivered on Saturday so the next step will be hanging the doors, and fitting the skirting and architrave, and glossing. Our internal doors are being delivered next Saturday (hopefully) and that will move us on a bit more.

We also sat down this afternoon to make a list (if you haven't realised by now I am the List Queen) about what we would like to do before our two weeks off in August, what we need to get, and do a bit of a stock-take on where we are. If you write really really small, everything between now and when we move in just about fits on one side of A4!

Surely that's a good sign.

Tuesday, 5 July 2011

More Colour....

The painting continues.....

Sitting room with side walls done in Rum Caramel.

Our bedroom in Ginger Glow. You'll need to bear with us with this room as this colour doesn't do it justice at the moment.

The study in Jade White.

We now only have the feature walls to do so that'll be a day next weekend and then the painting will be done.

Then it will be on to glossing the skirting and architrave.

In other news, we now have lights in the garage and utility and the sockets also work.

Monday, 27 June 2011

Colour At Last!

Well, we said we wanted colour!


(The gaps are where units will go).

Here is the kitchen and dining room in all its Redcurrant Glory. We weren't sure when we opened the tin as it looked more Raspberry Pink, but we love it! It's difficult to imagine it with all the kitchen units, furniture, skirting and coving, but it's how we imagined colour-wise so far, so that's a relief.

Other than the kitchen, the Guest Bedroom has had its main colour, and the hall, lobby, utility room and all the ceilings have now had two coats.

It seems to be moving on a pace again now, which is great, and just what we need.

Sunday, 12 June 2011

Painting Has Started

Today saw the first coats of the final finish paint applied.

The ceilings have been done in the lobby, cloakroom, bedrooms 1, 2 and 3 and the hallway.

It all seems very close to the end now!

Wednesday, 8 June 2011

The Hormanns From Hell

Note to self for fitting any future remote controlled roller shutter doors - DO NOT follow the instructions but use the common sense you were blessed with.

We had fun and games fitting these Golden Oak Decograin Hormann Doors.

The instruction book contains 'Maintenance and Operating Instructions' in over twenty different languages (2 pages for each language), and is then followed by 16 pages of diagrammatic instructions. All the manufacturers stipulate you need in order to fit the doors is 90mm around the opening to fit the frame on to. What they don't tell you is you also need room either side of the door frame in order to attach various Important Parts that require nuts to be done up.

After 4 1/2 hours of frustration with barely the four outer parts of the frame attached, and mutterings of "I'd like to see their guys try and fit our doors in six hours", and announcements of new words not currently included in the English (or Australian) Dictionary, we decided to abandon the instructions, and do our own thing!

Ta Da! A lot easier, which is reflected in the construction times. Door 1 = 12 hours, Door 2 = 2 hours
Notice the painted white ceiling and 'Stone' walls.

Despite all that we're very very pleased with them!


Tuesday, 7 June 2011

Testing Testing

I have been living in Tester Pot Heaven for the passed few weeks, as you'll see by the photos below. So far we have decided on: -

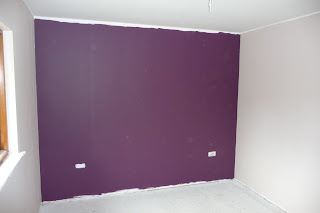
Guest Bedroom: feature wall = Mulberry Burst, contrasting walls = soft stone
The Hive (aka the office): feature wall = Lapis Blue, contrasting walls = TBC. We don't like the current contrasts so will have some more coming in a few days.
Main Bedroom: feature wall = Volcanic Splash 2, contrasting walls = TBC. We have some chocolate and coffee browns coming shortly.
Sitting Room: feature walls = Potters Wheel, contrasting walls = Rum Caramel 5
Dining Room: Two walls = Rum Caramel 5 linking with main kitchen colour below.
Kitchen: Main Wall = Redcurrant Glory linking with Rum Caramel 5 above.
Cloakroom: feature wall and alcove = Blue Reflection, contrasting walls = Wellbeing
Lobby: all walls = Putty

All ceilings will be Contemporary which is a slight off white. Skirting and architrave will either be Contemporary, or the contrasting colour in each room.

We have yet to decide on tiles for the bathroom and ensuite.

Monday, 6 June 2011

Skimming

Yep, the house is now complete and ready for final fix, decoration and fit out.

The plasterer and his team have done a great job of the final finish of both the house and garage. Darran has finished spraying the seal coat and we're ready to go. There are some pictures below which give you an idea that everywhere is WHITE, so I didn't put too many on as everywhere looks the same!

Note the 'Paint Station' in this picture used to help with refilling the sprayer. This must-have self-builder's kit isn't available anywhere else! Dragon's Den here we come....??

Kitchen looking towards the lobby and out the front door.
Looking into the dining area from the kitchen.
Sitting Room towards kitchen

WARNING: the next post will contain bright colours!

Saturday, 4 June 2011

Buildstore Case Study

A little while ago we were contacted by Buildstore, the UK's leading organisation for self build, renovation and conversion products and services. Our mortgage is with Buildstore Financial Services and during a conversation with our mortgage advisor, Tom McSherry, he asked to see some pictures of our project which he had helped to support, I sent him through a link to this blog, and the next day was contacted by Jaclyn Thorburn, PR and Communications Manager for Buildstore wanting to feature Darran and I as a case study!

We were really, really chuffed, to say the least.

Buildstore often get approached by national newspapers and magazines for stories for self-build projects and Darran and I are now in the mix should they get any requests. We are also featured on their website here.

Jaclyn has also requested a picture of Darran and I in front of the house, which we have promised when it's looking a little more picturesque i.e. when the Roundup has done its job, which shouldn't be too long now.

Thank you again to Jaclyn, Tom and the team at Buildstore for taking an interest!

Sunday, 20 March 2011

Plaster Boarding: Part 1

Photos of the plaster boarding so far. Two weekends have boarded....

Study
Study
Study
Hallway from the study.

Bedroom 3 - wardrobe.


Bedroom 3

And as you can see from the photo above, still quite a bit left to go at (and there is one more pile round the corner that you can't see...)

Sunday, 13 March 2011

The (Almost) Final Stretch!

Well, here it is. A long overdue blog post.

Although we haven't posted for a few months, we certainly haven't been idle.

All electrics and plumbing are now installed. The electric sign-off has taken place and Darran got top marks first time! He has researched and installed all electrics himself, and Building Control then appoint an electrician to sign off the works (they don't like doing it because it's a free service, but it worked well for us!). All plumbing pipes are in, including gas pipes. This sort of thing isn't that photogenic hence not posting regular photos for a while.

The next task was to fit all door linings and the insulation in the external walls and acoustic insulation in dividing walls. Building regulations only state that you need acoustic insulation where bathrooms join another room, but we decided to acoustic all of the bedroom wing.


This picture shows some of the heat recovery system pipes across the sitting room ceiling.


All that is now complete and we had our pre-plasterboard sign off last Friday 11th March and we passed with flying colours! This involved a visit by Building Control, the Structural Warranty Surveyor and Architect. Now it's on to the plaster boarding and actually making rooms! It is already half way there having the insulation in and you can no longer see from one end of the house to the other! Not wanting to get cold, we have already plaster boarded the study!

We have lined up a plasterer to come in and skim the walls and ceiling when the board is up and then it's on to the fun bit, decorating and fit out!

We're off to the Ideal Home Show on the 18th March to try and get some ideas on interiors, and specifically the use of colour - having only ever lived in rented accommodation since we have been together the only colour we know is magnolia!